
1553 succession crisis in England
The 1553 succession crisis in England arose from an intractable personal and religious conflict between the Protestant King Edward VI and his older sister and heiress, Mary, a Catholic.
The plan to remove Mary from the succession and replace her with a Protestant heir from the younger Tudor branch had been in Edward's mind since December 1552. In June 1553, the terminally ill Edward, influenced by the regent John Dudley, named sixteen-year-old Jane Grey, great-granddaughter of Henry VII and daughter-in-law of John Dudley, as his successor. On July 6, 1553, Edward died, and three days later the Privy Council proclaimed Jane Grey Queen of England. Mary, anticipating the actions of the London authorities, fled to eastern England, proclaimed herself queen, and led an armed rebellion. By July 13, when John Dudley personally led a military operation against Mary, she had mobilized up to six thousand armed supporters. Not daring to attack the superior rebel forces concentrated at Framlingham Castle, Dudley retreated to Cambridge and ceased his resistance. The actions of the smaller forces of Jane Grey's supporters on land and sea, and the actions of Princess Elizabeth's detachment, did not affect the outcome of the conflict. On July 19, the Privy Council deposed Jane Grey and proclaimed Mary Queen. John Dudley surrendered without a fight, and his allies joined the victors. On August 3, Mary triumphantly entered London and took control of the country. A five-year period of Catholic Counter-Reformation began in England.[1]
-
 Edward VI: King of England and Ireland from January 28, 1547
 -
 John Dudley: Duke of Northumberland, regent under Edward VI from October 1549
 -
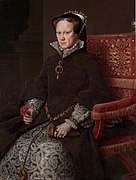 Mary Tudor: Henry VIII's eldest daughter, Edward VI's heiress
,_King_of_England,_after_William_Scrots.jpg)
.jpg)

The immediate victims of the July Crisis were John Dudley, Thomas Palmer, and John Gates,[2] who were executed for treason. Jane Grey, her husband, and her father were executed six months later, after the defeat of Wyatt's Rebellion.
Background
[edit]Henry VIII, who ruled England from 1509 to 1547, had three children: Mary, who was raised Catholic, and Elizabeth and Edward, who were raised Protestant. Henry VIII rewrote the Act of Succession three times — in 1533, 1534, and 1543. The final Act of Succession stipulated that Henry's heir was Edward, followed by Mary, then Elizabeth, and finally the descendants of the Tudor side branches of the Grey and Clifford families.[3] Upon Henry's death, the nine-year-old Edward became king, with Mary as his heir according to the 1543 succession law.[4] Henry's will specified that a Regency Council of sixteen men would govern the country until Edward reached adulthood, expected to be in 1555. However, the king's will was violated from the beginning. Instead of the council, real power was seized by individual regents: Edward Seymour from 1547 to 1549 and John Dudley from 1549 to 1553.[4]
With the approval of the teenage king, the two regents and the Archbishop of Canterbury, Thomas Cranmer, actively reformed the Anglican church, abolishing the Roman Rite. Mary, on the other hand, clung to Catholicism and openly protested the reform. Mary got along well with the regime of her long-time comrade Seymour, but she feared his successor, John Dudley, as she had once feared her father,[5] and openly despised him.[Note 1] Dudley was willing to compromise,[Note 2] but to Mary any concession on matters of faith was unacceptable.[6] In the spring of 1550, the rebellious princess decided to flee the country. Her cousin and spiritual advisor Charles V sent an armed squadron to help her, but at the last moment Mary changed her mind and remained in England.[7] Edward did not dare to persecute his sister, limiting himself to reprisals against her advisors.[8]
At the end of 1552 or the beginning of 1553, the fifteen-year-old King Edward VI,[9] who had already become a politician in his own right, planned to exclude Mary from the succession. He could not allow a Catholic to come to power, as this could reverse the reforms he was implementing, return the country to the spiritual authority to the Pope, and potentially lead to repression against those close to Edward. Edward's second possible motive was his intolerance of the perceived "illegitimacy" of his father's marriages to Catherine of Aragon (Mary's mother) and Anne Boleyn (Elizabeth's mother).[10] The third one was, that like Henry VIII, Edward did not favor the transfer of power to a woman for a practical reason: women, sooner or later, marry and fall under the influence of their husbands.[10][11] The influence that the future husbands of the unmarried Mary and Elizabeth could have on their policies was uncertain and potentially problematic.[10]
The crisis initiation
[edit]Deuise for the Succession (beginning of 1553)
[edit]
The first documentary evidence of Edward's plans is his My Deuise for the Succession. The surviving document is written from beginning to end in Edward's hand, in the firm handwriting of a physically fit man.[12] The imperfect, confused language of the order, according to David Lodes, betrays the political immaturity of its author.[13] It is not known whether it was Edward's sole initiative or whether the king's tutor William Thomas had a hand in its creation.[14][12] There is also no consensus on the date of composition of the first text of the Deuise. Wilbur Jordan, David Lodes,[15] Linda Porter, Geri McIntosh, and other modern historians believe that it was composed by Edward in full health — that is, no later than February or even January 1553.[16] According to Stanley Bindoff, it was written in mid-May, shortly before the wedding of Jane Grey and Guilford Dudley.[16] In all interpretations, the Deuise is seen as the will not of a dying king, but of one who was either healthy or expected to recover.[17] It remained a secret not only from Mary and Elizabeth but also from the regent John Dudley until early June 1553.[15] Edward probably realized that his proposal was against his father's will and custom (in the Plantagenet and Tudor dynasties, power always passed through the male line) and did not risk discussing it even with his closest supporters.[18]
The essence of the document was to give priority to the throne to the unborn sons of Lady Frances Grey, followed by the unborn sons of her unmarried daughter Jane Grey.[19] The choice of the descendants of Henry VII's youngest daughter was easy: Edward had no choice. He could not follow Salic law because of the paucity of men in the Tudor line:[18] the only such man, the eight-year-old Henry Stuart, was Catholic — and therefore unacceptable.[20][21] The Plantagenet men were also unacceptable: Edward Courtney spent his entire conscious life imprisoned in the Tower, cardinal Pole and his brothers were Catholics and political emigrants.[22] Having excluded from consideration the descendants of the Plantagenets, Henry VII's eldest daughter Margaret (the Scottish Stuarts) and his son (sisters Mary and Elizabeth), Edward was forced to choose from the descendants of Henry VII's youngest daughter Mary.[20] There were no male descendants in this branch of the Tudors, and the oldest woman of childbearing age was Mary's thirty-five-year-old daughter Frances Grey.[23] If Frances could not bear a child, Frances's eldest daughter, Jane, could. She was young, healthy, and brought up in the Protestant faith, and her other qualities were of no importance. Jane Grey was only a temporary means of reproduction. Once Edward had children of his own, there would be no need for Jane and her offspring.[12]
The King's Illness (February-June 1553)
[edit]On February 6, 1553,[16] Edward fell ill. After two weeks of bed rest, he appeared in public on February 21, though he was still not fully recovered.[16] His condition was not initially alarming, as he was considered a robust and healthy teenager. Government operations continued as usual. On March 1, Parliament met in London to discuss arrangements for an extraordinary tax.[24] Edward visited Parliament on March 31 to extend its session.[16] After a brief public appearance on April 11,[16] Edward retired to a country palace in Greenwich.[25] The precise course of his illness in April 1553 is not well-documented. It is likely that he felt some relief later in the month, but by May 7, he was too weak to receive the French ambassador. On May 12, doctors diagnosed Edward with a “suppurative tumor of the lung”.[26] Despite rumors circulating in London, aristocrats and diplomats did not perceive the situation as critical. According to ambassadors who visited the king on May 17, there was no immediate threat to his life.[25][27]
In April-May 1553, regent John Dudley focused on arranging two significant marriages within his family. He married his daughter Katherine to Henry Hastings, heir to the Earl of Huntingdon, and his son Guildford to Jane Grey. Jane's sister Katherine had also married Henry Herbert.[28] Guildford and Jane’s wedding took place on May 21. Charles V's ambassador, Jean Scheyfve, was the first to recognize the political implications and reported to the emperor on June 12,[15] that Dudley was orchestrating a coup to place Jane Grey on the throne. Scheyfve may have anticipated these developments and attributed plans to Dudley that were not yet fully formulated.[25] The marriage between Jane Grey and Guildford Dudley was not Dudley’s primary goal. Initially, Dudley aimed to marry Guildford to Margaret Clifford, but the Clifford family refused due to Dudley’s lack of noble lineage, leading him to negotiate with the Grey family instead.[25] Dudley did not intend to incite an armed rebellion, and legal avenues to remove Mary from the line of succession did not become available until June. Until early June, Dudley, invested in the king's recovery, remained hopeful. He summoned physicians to attend the ailing king and utilized all known remedies of the time, which fueled public speculation about Edward’s possible deliberate poisoning.[15]
On May 28, Edward’s illness took a turn for the worse. He developed signs of sepsis and kidney failure, experienced constant pain, and could only find brief relief through opiates.[29][30] Doctors informed Dudley and other nobles that the king had only a few weeks to live.[31] Aware of his impending death and still in clear consciousness, Edward hurried to finalize his affairs.[29] Between May 28 and June 11, he summoned John Dudley and formalized the Deuise for the Succession.[32][Note 3] The king’s intentions aligned closely with Dudley’s fears: Dudley, who had become a symbol of the hated Reformation for Mary, reasonably believed that Mary might seek to eliminate both him and his family once she came to power.[33][34][Note 4] Dudley actively supported the royal plan[35][15] and likely initiated an important revision to the second edition of the Deuise” which Edward had written himself. This revision changed “Jane Grey's descendants” in the first version to “Jane Grey and her successors”.[30][Note 5]
Land Deal (November 1552-May 1553)
[edit]
In 1547, the death of Henry VIII made Mary the largest landowner in East Anglia: under her father's will, she received 32 estates in Norfolk, Suffolk, and Essex.[36][Note 6] Along with the inheritance, Mary received for the first time in her life a large support group "on the land" — clients from the local nobility and common people.[37][Note 7] In November-December 1552, the Privy Council offered to exchange part of her estates for crown lands, ostensibly to consolidate the royal estate and raise revenue.[38] The deal was concluded six months later, in April-May 1553. Mary, having given up the king's coastal estates in Essex, received in return a much larger and more profitable area, and successfully "rounded up" his possessions in the interior. She received the royal castle of Hertford and the fortified Framlingham Castle, which had recently belonged to the disgraced Thomas Howard.[39][Note 8] It was at Framlingham in July 1553 that the main events of Mary's rebellion against Jane Grey took place.
The meaning of this unfavorable deal, which placed an important military base in Mary's hands, remains a mystery. None of the proposed versions have reliable evidence. David Lods suggests that Edward wanted to cut Mary's attempts to flee abroad by denying her access to the sea.[40] There are opinions that London nobles, who foresaw Mary's imminent rise to power and tried to buy her favor in advance, were behind the exchange. According to Geri Mackintosh,[41] the deal may have been a secret payment to Mary for renouncing her hereditary rights; however, historians are almost unanimous that Mary was not privy to Edward and Dudley's plans and never agreed to abdicate.[42][43] She learned of these plans or suspected them in late June 1553, when a wide range of nobles, judges, and diplomats were already involved in the discussion of the royal succession patent.[44]
The Succession Act (June 1553)
[edit]The king's will alone was not enough to change the order of succession. Edward had to approve it by one of two possible procedures: either the law had to be approved by Parliament, or a royal letters patent had to be approved by the Privy Council, the high clergy, and the chief judges[45] and then ratified by Parliament.[46] Parliamentary hearings required time, which Edward no longer had and would have led to unwanted publicity, so the king and Dudley took the second route.[45] On June 11, Edward summoned the high justices to his house for the initial approval of the next, third, revision of the Deuise.[30] The judges were to edit the text, unanimously approve it, and submit the final, fourth revision to the king for approval. However, on June 12, at a meeting with the king, Chief Judge Edward Montagu strongly refused to approve the draft and accused Dudley of treason.[47] Dudley responded with counter-accusations, and the dispute nearly ended in an armed clash.[47] As a result, on June 15-16, the judges drew up a legal document unprecedented before—a will, a royal patent, and a public manifesto at the same time.[48]
Up to this point, the Privy Council, torn by partisan interests, had no unanimous opinion on the succession to the throne. However, the news of the judges' support for the royal project radically changed the balance of power: now only a few dared to oppose the king's will.[47] Dudley persuaded those who hesitated with bribes and threats, and by June 18, the Council had reached a consensus.[49] Thomas Cranmer and William Cecil, who had hitherto objected, gave up the fight and joined the majority of the Council.[50] On June 21, Edward signed the clean slate of the fourth revision; the very next day, Dudley collected a sufficient number of signatures from the titled nobility and high clergy.[51] 102 people signed the Succession Act: the first, as the highest clergyman, was Cranmer; the last, after Edward's death, were the aldermen of the City of London Corporation.[52][Note 9] Having secured the approval of the royal patent, Dudley did not venture to announce it publicly. This decision, whose motives can only be guessed at, was wrong: at the critical moment, the provinces, which considered Mary the rightful heiress, refused to support Jane Grey.[53]
Jane Grey (July 1553)
[edit]
Edward VI died at about nine o'clock on the evening of July 6. Jane Grey, at that time living out of town in Chelsea, remained unaware of the decision of the late king and the Privy Council.[54] According to Jane's own imprisoned testimony in August 1553, around June 19, she received her first informal warning of Edward's choice and did not consider it serious.[55] On July 9, she received a strange summons to attend the Privy Council at Syon House, John Dudley's unfinished palace.[55] There, after a long wait, she was met by John Dudley, Francis Hastings, William Herbert, William Parr, and Henry Fitzalan. The nobles informed Jane Grey of the king's death and that, in accordance with his will, she was to accept the crown of England.[55] The next day, July 10, heralds announced the change in the order of succession to London for the first time, and Jane Grey, already as queen, moved from Syon House to a temporary residence in the royal chambers of the Tower.[56]
Londoners accepted the change with indifference. Up to and including July 13, the city was quiet; the only man who openly protested against the new regime, Gilbert Potter, was sentenced to have his ears cut off.[57] The first proclamations in favor of Mary appeared in London on July 13[58] or 16,[59] and the first public posters on July 18. East Anglian town councils were divided, but the largest towns initially supported Jane Grey.[60][Note 10]
Armed Conflict
[edit]The outcome of the crisis of 1553 was predetermined by Dudley's strategic error: despite observing Mary's behavior at court for many years, he did not consider her a dangerous opponent.[42][61] Dudley was sure that in a difficult moment, Mary would fail and give up, and he could not assume that she would prove to be a strong-willed and confident leader.[42][62] He was unwilling or hesitant to arrest Mary during Edward's lifetime, and when Edward died, it was too late: she slipped out of supervision, fled to pre-arranged positions, and led an armed rebellion there. Dudley was completely unprepared to defend the regime he had created. By July 11, his personal force amounted to no more than six hundred people,[63] his allies were unreliable and defected to Mary at the moment of crisis, and all the mercenary troops were stationed near the Scottish border—too far away to intervene in the conflict in East Anglia.[64] In this region, Dudley had no detachments of his own, no armed allies, and no reliable agents.[65]
Dudley was not alone in his delusion: in the first two weeks of July 1553, no observer in London could have imagined that Mary would be able to seize and hold power. The French ambassador Antoine de Noailles assured Henry II hat the Privy Council was unanimously in favor of Jane Grey and that the throne was secure against Mary's encroachments.[66] Charles V prepared for the worst, not believing that the victors would keep Mary alive.[67] Both the French and imperial ambassadors were confident of Jane Grey's victory until the coup in the Privy Council on July 19, 1553.[68]
Mary's escape (July 4-8, 1553)
[edit]At the end of June 1553, Mary moved from her estate at Newhall to the nearby residence of Hunsdon, 28 miles north of London.[69] Before the move, she had defiantly ordered that Hunsdon be prepared for a long stay,[70] but on July 4, she suddenly left and traveled north towards Cambridge. The reasons for Mary’s decision to flee on July 4, while Edward was still alive, remain unknown. Modern historians reject stories that well-wishers warned Mary of the danger halfway to London:[71] she regularly received news from London, both from her allies and personally from Dudley, and fully understood the risks of her position.
The circumstances of Mary's flight are surrounded by legends and unreliable testimonies.[72] The chronology of Mary's journey has been reconstructed by historians from scattered accounts, none of which gives a complete picture of the events.[73] The most important source Vita Mariae Angliae reginae by Robert Wingfield, a participant in the coup, does not give accurate dates.[71][Note 11]
Mary was accompanied on her journey by 50 to 60 armed men — her entire court led by Robert Rochester, Henry Jerningham, and Edward Waldegrave.[74] A day's horseback travel on a good road was 20 to 30 miles in those years.[75] Women traveled on horseback or in litter; carriages and baby carriages did not yet exist in England at that time[76] (the first carriage in England appeared in 1555, freight carts began to come into use around 1550, and the main land vehicle was a packhorse).
After spending the night at Soston Hall with her ally John Huddleston on July 5, Mary turned northeast to her possessions in south Norfolk. On the evening of July 7, while Mary was at the manor of Euston Hall near Thetford, she was overtaken by messengers from London with news of the King's death.[71][77] She was first informed by a courier sent by Nicholas Throckmorton. Mary, probably fearing Dudley's provocation, did not act immediately, but waited for confirmation from a reliable source — most likely Mary's personal physician, Thomas Hughes, who had access to the palace.[78][79] After confirming the authenticity of the news, Mary left urgently on 8 July for Kenninghall Manor, thirteen miles from Euston, the rendezvous point for her military campaign.[71][79]
Rebel mobilization (July 8-14, 1553)
[edit]On July 8, 1553, Mary set in motion the armed rebellion. The first stage was the summoning of Mary's supporters from East Anglia to Kenninghall and the recruitment of new allies throughout the country — titled nobles, royal officials, and town councils.[80] On July 8 and 9, the rebel headquarters sent many professionally written personal letters and proclamations across the country.[80] Their content, mailing schedule, and list of addressees were coordinated in advance of the flight from Hunsdon.[74][79] Some of these letters have survived, including one dated July 9 to Edward Hastings, who had led a rebellion in support of Mary in the Thames Valley.[74] On July 9, the first small but well-armed bands of Mary's supporters arrived at Kenninghall.[79] On July 12[81][82] or 15,[83] the rebel army, which had grown to six thousand men[84] but still lacked a professional commander,[85] moved to Framlingham Castle (25 miles southeast of Kenninghall).[82] Mary's advisers prepared to repel Dudley's attacks.[83]
Mary's party consisted of a core of committed Catholics and many fellow travelers who joined the rebellion for a variety of motives.[86] Mary made full use of the underground network of like-minded Catholics, but she also needed the support of Protestants and therefore refrained from religious rhetoric for the time being.[87] Paradoxically, the rebellion was supported not only by individual Protestants but also by entire Protestant communities, such as the urban community of Coventry.[83] Suffolk peasants were brought into Mary's camp by their hatred of Dudley for his brutal defeat of Robert Kett's rebellion.[88][89] The lord-lieutenant of Norfolk, Henry Radcliffe, Earl of Sussex, was forced to defect to Mary's side and led her army[90] after the rebels took his son hostage.[91] The Lord Viceroy of Suffolk, Thomas Wentworth, supported Jane Grey on July 11 but moved with his troops to Mary's side on July 14, probably out of self-preservation as his home was only twenty miles from the rebel camp.[92] Thomas Cornwallis, Sheriff of Norfolk and Suffolk,[92] and Richard Southwell, one of the authors of the "Declaration",[43] did the same. The reluctant John de Vere, Earl of Oxford, was persuaded by his own servants, who were prepared to go to Mary with or without their master.[93][94] Osbert Montfort, a merchant from King's Lynn, sided with Mary and secured the arrest of rivals who supported Jane Grey. Protestant adventurers Peter Carew and Nicholas Throckmorton voluntarily campaigned for Mary[95] — and six months later participated in a rebellion against her.
Robert Dudley's actions (July 7-18, 1553)
[edit]On July 7, John Dudley sent his son Robert with a force of three hundred men to arrest Mary.[96] Robert Dudley, like his father, was unaware of Mary's plans and actions, and went first to Hunsdon.[82] Then, following her route, on July 9 or 10, Robert Dudley reached the vicinity of Kenninghall.[82] At this time, Mary's force amounted to no more than six hundred men, among whom there was no single commander and not a sufficient number of officers.[82][97] Robert did not attack them but withdrew fifty miles to the northwest, to the Fen moors, and occupied the town of Wisbech. In the following days, Robert Dudley subdued the whole coast of Wash Bay.[98] On July 16, he swore in Jane Grey at Thetford, and on July 18, at King's Lynn.[98]
Eric Ives has suggested that throughout the campaign, Robert Dudley acted on his father's instructions rather than on his own initiative.[82] The Dudley clan's control of the Fen moors effectively blocked Mary's route into the Midlands and prevented reinforcements from reaching her from the north and west.[99] It is likely that if John Dudley had sent several such blocking units, Mary would not have been able to mobilize enough forces and the outcome of the confrontation would have been different; Robert Dudley's single, albeit effective, action could not prevent the rebels from concentrating.[98]
Another Dudley, a distant relative of Regent Henry, was sent to France to seek support from Henry Valois.[83] On July 18, Henry Dudley met with the King of France and secured an unofficial pledge of support from him; events in England were not affected by these negotiations.[83] After the defeat of the Dudley clan, their enemies claimed that John Dudley was willing to surrender Calais and Ireland to the French in return for political support, but according to David Loades, this accusation was unsubstantiated.[83]
Maritime Events (July 10-17, 1553)
[edit]
By July 10, the Privy Council was convinced that Mary was planning to flee by sea to the Spanish Netherlands. Mary's escape would have been a fortunate way out of the crisis, but fleeing into the hands of Charles V, a strategic opponent of Edward and Dudley's regime, was undesirable. The Council sent a squadron of six ships under Richard Brooke, formed at Greenwich while Edward was still alive,[100][Note 12] to intercept the "fugitives". Historians have traditionally viewed the dispatch of Brooke's squadron as an isolated episode, unrelated to Dudley's land campaign. According to Eric Ives, the dispatch of the ships may have been part of an overall plan in which Robert Dudley's detachment cut off Mary from the northern counties and their ports, and John Dudley's main force pushed her out to the Suffolk coast, where Brooke was to sail.[101]
On July 13 or 14, a storm forced Brooke to seek refuge in ports: five ships took refuge at the mouth of the Orwell River, and Captain Grice's galleass[102] Greyhound was taken far north to Great Yarmouth.[103] When Grice left the ship, the crew mutinied and went over to Mary's side.[103] The instigator was the bosun, who encouraged the crew to rob the captain's cabin.[104] The mutinous ship also refused to obey Mary's agents and sailed south to rejoin the squadron.[103] On July 17, Grice, who had been arrested, swore an oath to Maria, returned to service, and then spent two years trying to recover the stolen goods through the courts.[103][104]
The squadron was met at the mouth of the Orwell by Henry Jerningham, who had been sent to Ipswich to negotiate with Thomas Wentworth.[103] On July 14, after Wentworth had gone to Mary's camp, Jerningham was also able to negotiate with Brooke.[103] By this time, according to some accounts, the crews of Brooke's ships had already defected to Mary's side; according to others, they followed the example of the Greyhound crew and demanded the arrest of the captains.[104][105] On July 15, Brooke and Jerningham left for the Framlingham camp, taking some of the ship's artillery with them.[106] By July 17, all crews had sworn allegiance to Mary, and two days later Mary's appointee, Richard Cavendish, took command of the squadron.[104]
John Dudley's campaign (July 13-20, 1553)
[edit]Between July 10 and 13, the Privy Council recognized the threat posed by Mary and decided to send a full military expedition to East Anglia.[107] The road to this decision was not an easy one: there was no consensus among the advisors, and Jane Grey unexpectedly intervened.[107] According to one source, she demanded that her own father be appointed commander; according to others, she protested against such an appointment.[107][108] Contemporaries recognized that Henry Grey was unsuitable for the role,[109] and other available candidates were weak. John Dudley was forced to take command of the punitive campaign, leaving London in the care of the same Henry Grey and unreliable fellow travelers from the Privy Council.[110][97] On July 11, without waiting for their decision, Dudley began feverishly recruiting mercenaries.[63] His agents offered hired infantrymen, according to various sources, from 10 to 20 pennies a day—against the usual pay of 6 pence.[63] The number of troops raised by Dudley is not reliably known. David Lodes writes of 1,500 men marching from London.[97] Foreign ambassadors estimated it at 3,000 to 4,000 men, while the prosecutor at John Dudley's trial cited 3,000 (including any reinforcements received en route).[63] The composition of the force (mostly mounted) was far from optimal, but Dudley had artillery,[63] which Mary had not had until the arrival of naval guns from Brooke's squadron. Dudley himself and his companions, William Grey and Edward Clinton, were the best English generals of their day,[111] and the quality of Dudley's cavalry was described by witnesses as excellent.[112]
According to the most reliable source, Dudley's main force marched on July 13, and the artillery and supplies on July 15.[111][Note 13] Instead of marching directly to Framlingham via Colchester (90 miles), Dudley took the same route through Cambridgeshire as Mary (115 miles).[112] On July 14, Dudley's leading forces crossed the Wear and received reinforcements from the Midlands; on July 15, they captured the castle of Soston and continued their march north.[112] At the same time, in Dudley's immediate rear, in Buckinghamshire, the influential feudal lords William Windsor, Edward Hastings, and Edmund Peckham mutinied in Mary's favor.[113] This revolt, known in English historiography as the Thames Valley Rising, quickly spread to neighboring Oxfordshire and part of Northamptonshire.[113] It did not directly affect the outcome of the conflict,[114] but it demoralized the Privy Council. London was rife with rumors of tens of thousands of Sir Peckham's men allegedly marching to storm the Tower.[115][116]
On the morning of July 18, Dudley left Cambridge for Framlingham, expecting to receive reinforcements along the way. Instead, he was met at Newmarket by a messenger with alarming news from London.[117] Dudley reached Bury St. Edmunds, turned back, and returned to Cambridge on July 19 or 20, where he was overtaken by news of a coup in London.[118] There are several explanations for what happened at Bury St. Edmunds. According to the traditional version, Dudley's forces were undermined by mass desertions: by July 19, the Regent had nothing to fight with. However, all sources reporting militia desertions are based on hearsay,[119] and all influential, named commanders remained in the ranks on July 19. It has been suggested that Mary's agents deprived the army of food by stealing cattle.[112] According to Eric Ives, Dudley refused to fight because of the intelligence he had received about the size and composition of the enemy forces. As they approached, the quality of the intelligence improved, and by July 19 Dudley was convinced that he was facing ten thousand men in prepared positions.[120] Perhaps, writes Ives, the decisive factor was the news of the arrival of shipboard artillery.[120]
Rebellion in London (July 19, 1553)
[edit]On July 19, the Privy Council deposed Jane Grey, proclaimed Mary Queen, and ordered Dudley to cease his resistance. The circumstances and motives of this decision are not known (all witnesses distorted the facts to some extent to save their own lives from Mary's wrath),[121] but its timing is known.[122] It is likely that the organizers of the coup in the Council, William Herbert (Earl of Pembroke), William Paget, and Henry Fitzalan (Earl of Arundel),[123] decided to switch to Mary's side no later than July 18.[124] However, by the morning of July 19, all available members of the Council were acting on Jane Grey's side. In the afternoon, they met at Herbert's house at Baynard's Castle in London and agreed to give the crown to Mary.[122] The nobles then summoned the Lord Mayor of London and the aldermen to the castle and announced their decision.[122] The news quickly spread to the streets, and even before it was officially announced, a popular celebration had begun.[122] In the evening, Paget and Fitzalan carried the Council's letter of repentance[125] to Framlingham.[126] After swearing an oath to Mary, Paget and Fitzalan set out for Cambridge on her orders to arrest John Dudley.
-

-
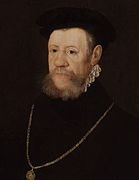
 William Paget, 1st Baron Paget
 -


The events at Dudley's Cambridge camp on July 19-20 are described in sources in fragmentary and contradictory ways.[127] Presumably, on the evening of July 20, Cambridge received Mary's ultimatum.[127] Dudley convened a council of war and announced surrender.[127] He, along with his sons and advisers, went to the market square and publicly proclaimed Mary queen; according to an eyewitness's recollection, he threw his hat in the air and laughed so hard that tears ran down his face.[128] On the same day, a courier from London delivered to Dudley the order of the Privy Council to lay down their arms and swear allegiance to Mary.[129] A mass exodus of Dudley's former allies and advisers began, hurrying to save their own lives and careers.[129] On July 23[130] or 24,[131] John Dudley surrendered to Henry Fitzalan.[130]
Elizabeth's actions (July 7-31, 1553)
[edit]Princess Elizabeth did not take active part in the events of July 1553.[132] On July 7, the Privy Council summoned her to London, but Elizabeth was said to be ill, and the London High Commissioners did not dare to remove her from Hatfield House by force (as Mary did to Elizabeth during Wyatt's Rebellion).[133] Half a century later, William Camden claimed that John Dudley negotiated with Elizabeth to recognize Jane Grey, but no documentary evidence of this survived.[132][134] According to Camden, Elizabeth firmly refused the money and lands offered as a payoff for relinquishing her right to the throne.[132] It has been suggested that Elizabeth agitated her dependents in favor of Mary, but even this view is not supported by documentary evidence.[132]
Immediately after Dudley's defeat, Elizabeth joined the victorious side. On July 29, ahead of her sister, Elizabeth entered London triumphantly, accompanied by two thousand troops dressed in the dynastic colors of white and green.[135] How, when, and for what purpose she gathered so many supporters is unknown.[135] David Lodes suggests that Elizabeth's “support group” formed within a week of Jane Grey's deposition,[135] when the crisis had already been resolved. On July 31, Elizabeth left London to meet her sister, this time with an escort of a thousand people.[135] Perhaps she wanted to show Mary her own political weight, but she decided to ignore.[135][136]
Mary's triumph
[edit]
On July 24, after receiving confirmation of Dudley's arrest, Mary left Framlingham for London, accompanied by ten thousand troops.[137] The journey took ten days: the queen traveled leisurely through her own estates, stopping overnight at the homes of loyal nobles.[138][139][Note 14] Along the way, the procession was joined by titled defectors from Dudley's camp, eager to swear oaths to Mary and buy their freedom at the expense of the collusion of former comrades.[140] Among them was Frances Grey, mother of the "Queen for nine days" and wife of Henry Grey. She asked for clemency for herself and her husband, but not for her daughter.[141]
On August 3, 1553, Mary entered London in triumph.[142] In keeping with old English tradition, she released four of Edward VI's prisoners from the Tower: Anne Seymour, Edward Courtenay, Stephen Gardiner, and the aged Thomas Howard.[143] A few days later, Gardiner was appointed Lord Chancellor, and Howard was appointed to preside over the trial of Dudley and his companions.[143]
Throughout the crisis, Edward's body remained unburied. Mary, even after her brother's death, continued to regard herself as his tutor and patroness and was sincerely convinced that a Catholic burial would help his lost soul.[144] She believed that a concession to the Protestants would be seen as weakness and would provoke the "heretics" to disobedience.[145] However, her advisors dissuaded her, and on August 8, Edward was buried in Westminster Abbey according to the Protestant rite.[146]
Repressions
[edit]The main participants from Jane Grey's side were arrested by the Privy Council and taken to the Tower long before Mary returned to London. Jane Grey herself and her husband probably did not leave the Tower at all;[147] they were simply moved from the temporary royal quarters to arrest. On July 23, John Dudley's arrested wife was taken to the Tower.[147] On July 25, the first group of Cambridge arrestees arrived at the Tower of London: John Dudley and his relatives, along with Francis Hastings, Thomas Palmer, John Gates, and his brother Henry.[131] On July 26, Robert Dudley and William Parr were placed in the Tower, and on July 27, Henry Grey and his companions.[147] Later than all of them, on August 6, Henry Dudley, who was arrested in Calais,[147] was brought to the Tower. Henry Manners was imprisoned at Fleet Prison.
A total of 150 named individuals were arrested or briefly detained.[148] Of those arrested, only Gustin, Grey, Manners, and Parr were allies of Dudley rather than his relatives or clients: the queen's wrath fell primarily on the family of the fallen regent.[147] Second, Mary's agents sought out and arrested officials who had offended the queen by making public statements about the illegitimacy of her birth. This category of "traitors" included chief justices and minor officials; Mary singled out in particular John Cheek, a Cambridge professor and clerk of the Privy Council, who had drafted an insulting letter from the Council to Mary on July 10.[149]
After brief interrogations, the seven principal arrestees were brought before a court presided over by the recently pardoned Thomas Howard.[147] At the trial on August 18, William Parr and Dudley's eldest son, John (Earl of Warwick), pleaded guilty in full, while the elder Dudley defended himself vigorously, arguing that he had acted solely within the royal mandate.[116][147] The next day, Andrew Dudley, John Gates, his brother Henry, and Thomas Palmer were tried; all seven were sentenced to death.[116] After the sentence was pronounced, Dudley converted to Catholicism, confessed to Stephen Gardiner, and was then led through the city in a pompous Catholic procession with the other renounced Protestant convicts.[150] On August 22, the disgraced regent John Gates and Thomas Palmer were executed. Palmer was not a member of Dudley's inner circle and had not participated in Mary's whitewashing; her reasons for singling him out of the hundreds of supporters of the fallen regent remained a mystery.[151] All the others arrested (including the four men sentenced to death with Dudley)[116] escaped execution: some, like the unfortunate Captain Grice, were quickly released and suffered no punishment,[2] while others spent several years in prison.[152] Henry Grey, Lord Admiral Edward Clinton, and Judge Montague bought their freedom by paying several thousand pounds each in attributions to Mary.[153]
In November 1553, the court sentenced Thomas Cranmer, Jane Grey, Guilford Dudley, and his brothers Henry and Ambrose to death (Robert Dudley was sentenced later, in January 1554).[116] The public regarded the verdict as a formality, expecting all the condemned to be pardoned soon.[116] Mary did not decide to execute Jane Grey and Guilford Dudley until February 1554, at the height of Wyatt's Rebellion. Henry Grey, an active participant in the rebellion, was executed on February 23, 1554, and Thomas Cranmer in 1556. John Dudley's eldest son, John Dudley, died in 1555, a few days after his release from the Tower,[154] but the other Dudley brothers survived. The Dudley family, having lost its confiscated property, was not extinct but was forever removed from the political scene.[155] Of the surviving Dudleys, only Ambrose Dudley, who died childless, Robert Dudley and his illegitimate son by Baroness Sheffield, and the pirate Henry Killigrew,[155] a Dudley client who once held prominent positions, have gone down in history.
Notes
[edit]- ^ Porter, 2010, p. 3073 quotes Maria's words as set forth by Charles V's ambassador, François van der Delft: "The earl of Warwick is the most unstable man in England. The conspiracy against the Protector [Seymour is meant] has envy and ambition as its only motives»..
- ^ Porter, 2010, pp. 3102—3114: Dudley, who took power as regent after Edward Seymour, managed to reconcile with the fallen Seymour and his supporters. Dudley temporarily brought Seymour back into significant political influence and negotiated favorable peace agreements with both France and Scotland.
- ^ Ives, 2009, p. 155: according to Ives, such a meeting could have occurred earlier, no later than May 7.
- ^ Ives, 2009, p. 107-108 presents a classic historiography of the question of Dudley's motives.
- ^ Loades, 2004, p. 121, suggests that this change was prompted by William Thomas.
- ^ See also a map of Mary's possessions in 1547 and 1553. Archive: 19 October 2013 at the Wayback Machine (appendix to McIntosh, 2009).
- ^ Porter, 2010, p. 3017: In the summer of 1549, a major peasant rebellion occurred in Norfolk, on Mary's lands. On August 27, 1549, two thousand rebels were killed in a decisive battle with John Dudley's forces. The memory of this loss fed the Norfolk people's hatred of the Dudley regime for many years - and turned them into Mary's supporters.
- ^ See also a map of Mary's possessions in 1547 and 1553. Archive: 19 October 2013 at the Wayback Machine (appendix to McIntosh, 2009).
- ^ A list of the signatories is given, for example, in Markham, C.R. King Edward VI: His Life and Character. Smith, Elder, 1907. Archive: 19 October 2013.
- ^ Williams, 1998, p. 85 notes that the positions of cities were usually determined not by high politics but by local business interests.
- ^ Ives, 2009, p. 226: provides a traditional reconstruction of the chronology based on Wingfield's account and a critical analysis of it.
- ^ Ives, 2009, p. 207: the exact date of its dispatch is unknown.
- ^ Ives, 2009, pp. 201-202: There are also sources dating Dudley's release to July 12 and 14.
- ^ Ives, 2009, p. 30: including two nights at Robert Wingfield's house four miles from Ipswich.
References
[edit]- ^ Lee (2006, p. 62)
- ^ a b Loades (1996, p. 271)
- ^ Ives (2009, p. 2)
- ^ a b Lee (2006, p. 24)
- ^ Porter (2010, p. 3082)
- ^ Porter (2010, pp. 3102–3114, 3171–3175)
- ^ Porter (2010, pp. 3128–3215)
- ^ Porter (2010, pp. 3364–3380)
- ^ Loades (1996, p. 234)
- ^ a b c Loades (1996, p. 232)
- ^ Ives (2009, p. 140)
- ^ a b c Loades (1996, p. 231)
- ^ Loades (1996, pp. 231, 233)
- ^ Porter (2010, p. 3473)
- ^ a b c d e Loades (2004, p. 121)
- ^ a b c d e f Ives (2009, p. 138)
- ^ Ives (2009, pp. 139, 140)
- ^ a b Loades (1996, p. 233)
- ^ Porter (2010, p. 3484)
- ^ a b Porter (2010, p. 3490)
- ^ Ives (2009, p. 141)
- ^ Ives (2009, pp. 139–141)
- ^ Porter (2010, p. 3507)
- ^ Loades (1996, p. 230)
- ^ a b c d Loades (1996, p. 238)
- ^ Ives (2009, p. 139)
- ^ Ives (2009, pp. 138–139)
- ^ Ives (2009, p. 153)
- ^ a b Porter (2010, p. 3461)
- ^ a b c Ives (2009, p. 145)
- ^ Ives (2009, pp. 144–145, 157)
- ^ Ives (2009, p. 155)
- ^ Lee (2006, p. 25)
- ^ Ives (2009, p. 107)
- ^ Porter (2010, p. 3501)
- ^ Porter (2010, pp. 2752–2761)
- ^ Porter (2010, pp. 2752–2761, 3017)
- ^ McIntosh (2009, p. Ch. 4, para 5.)
- ^ McIntosh (2009, p. ch. 4, para. 4, 9, 12, 19.)
- ^ McIntosh (2009, p. ch. 4, para. 6.)
- ^ McIntosh (2009, p. ch. 4, para. 25, 33.)
- ^ a b c Ives (2009, p. 172)
- ^ a b McIntosh (2009, p. ch. 4)
- ^ Porter (2010, pp. 3586–3597)
- ^ a b Porter (2010, p. 3516)
- ^ Hunt, A. The Drama of Coronation. Cambridge University Press, 2010. pp. 113—114. ISBN 9781139474665.
- ^ a b c Porter (2010, p. 3522)
- ^ Ives (2009, p. 146)
- ^ Ives (2009, p. 161)
- ^ Ives (2009, pp. 162–164)
- ^ Ives (2009, p. 165)
- ^ Ives (2009, pp. 137, 165)
- ^ Ives (2009, p. 168)
- ^ Ives (2009, p. 186)
- ^ a b c Ives (2009, p. 187)
- ^ Ives (2009, pp. 1, 188)
- ^ Ives (2009, pp. 193–194)
- ^ Porter (2010, p. 3924)
- ^ Ives (2009, p. 194)
- ^ Loades (1996, p. 260)
- ^ Loades, 1996, p. 265: «Northumberland's decision ... was a gamble based upon a complete misjudgement of Mary ... he did not expect resolute action from the princess herself».
- ^ Loades (1996, p. 259: «This was the last reaction which Northumberland had expected».)
- ^ a b c d e Ives (2009, p. 199)
- ^ Loades (1996, pp. 258, 265)
- ^ Loades (1996, pp. 259, 261)
- ^ Porter (2010, p. 3554)
- ^ Porter (2010, p. 3557)
- ^ Loades (1996, pp. 262, 263)
- ^ Ives (2009, p. 9)
- ^ Ives (2009, p. 174)
- ^ a b c d Ives (2009, p. 226)
- ^ Ives (2009, p. 225: «Mary’s movements in the first week in July 1553 are surrounded with a deal of myth»)
- ^ Ives (2009, pp. 225–227)
- ^ a b c Ives (2009, p. 228)
- ^ Williams (1998, p. 14)
- ^ MacFarlane, C. The comprehensive history of England, volume 2. Glasgow, Edinburgh, London and New York: Blackie and son, 1859. p. 256.
- ^ Loades (1996, p. 257)
- ^ Ives (2009, p. 227)
- ^ a b c d Loades (1996, p. 259)
- ^ a b Ives (2009, pp. 228–229)
- ^ Porter (2010, p. 3767)
- ^ a b c d e f Ives (2009, p. 202)
- ^ a b c d e f Loades (1996, p. 263)
- ^ Porter (2010, p. 3920)
- ^ Loades (1996, p. 261: «by 13 July ... growing but still leaderless army at Kenninghall»)
- ^ Ives (2009, pp. 235, 237)
- ^ Ives (2009, p. 234: «Mary, indeed, was careful to avoid making Catholicism a rallying cry»)
- ^ Ives (2009, p. 233)
- ^ Lee (2006, p. 25: «he was remembered with bitterness in East Anglia for the part he had played in putting down Kett’s rebellion in 1549. This area declared solidly for Mary».)
- ^ Porter (2010, p. 3873)
- ^ Ives (2009, p. 234)
- ^ a b Ives (2009, p. 236)
- ^ Ives (2009, p. 221)
- ^ Porter (2010, p. 3861)
- ^ Ives (2009, pp. 236, 237)
- ^ Ives (2009, p. 171)
- ^ a b c Loades (1996, p. 261)
- ^ a b c Ives (2009, p. 209)
- ^ Ives (2009, pp. 206–207)
- ^ Ives (2009, pp. 207, 237)
- ^ Ives (2009, pp. 207–208)
- ^ Konstam, A. Tudor Warships (I). Osprey, 2008a. pp. 37, 47. — 48 p. (Osprey New Vanguard Series 142). ISBN 9781846032516. Архивированная копия. Дата обращения: 30 September 2017. Archive: 19 October 2013.
- ^ a b c d e f Ives (2009, p. 237)
- ^ a b c d Knighton, C. S., Loades, D. M. The Navy of Edward VI and Mary I. Ashgate, 2011. pp. 275—281. 652 p. (Publications of the Navy Records Society). ISBN 9781409418481.
- ^ Ives (2009, pp. 237–238)
- ^ Ives (2009, p. 211)
- ^ a b c Ives (2009, p. 198)
- ^ Porter (2010, pp. 3829–3832)
- ^ Loades (1996, p. 261: «reliable if not very competent».)
- ^ Ives (2009, pp. 198–199)
- ^ a b Ives (2009, p. 201)
- ^ a b c d Ives (2009, p. 206)
- ^ a b Ives (2009, p. 222)
- ^ Ives (2009, p. 222: «Yet although so near to London, these risings in the Thames Valley cannot have been the decisive factor in Mary’s victory».)
- ^ Porter (2010, p. 3854)
- ^ a b c d e f Ives (2009, p. 10)
- ^ Ives (2009, pp. 203, 208, 209)
- ^ Ives (2009, pp. 203, 212)
- ^ Ives (2009, p. 204)
- ^ a b Ives (2009, p. 210)
- ^ Ives (2009, p. 213: «much of what there is has yet again been spun in an effort to obscure responsibility».)
- ^ a b c d Ives (2009, p. 214)
- ^ Porter (2010, p. 3960)
- ^ Loades (1996, pp. 263, 265)
- ^ Loades (1996, p. 266: «a letter of extraordinary abasement even by the standards of the mid-sixteenth century ...(followed by a long quotation from the letter»)
- ^ Ives (2009, p. 215)
- ^ a b c Ives (2009, p. 241)
- ^ Ives (2009, p. «As Sandys remembered it years later, the duke threw the ritual hat into the air and ‘so laughed that the tears ran down his cheeks for grief’»)
- ^ a b Ives (2009, p. 242)
- ^ a b Porter (2010, p. 3995)
- ^ a b Loades (1996, p. 266)
- ^ a b c d Loades (2006, p. 83)
- ^ Loades (2006, p. 91)
- ^ Ives (2009, p. 173)
- ^ a b c d e Loades (2006, p. 84)
- ^ Porter (2010, p. 4036)
- ^ Porter (2010, p. 3998)
- ^ Porter (2010, p. 4000)
- ^ Ives (2009, p. 30)
- ^ Ives, 2009, p. 243: «They expressed their relief by turning on their erstwhile colleagues, a reaction which was evident again in the August treason trials».
- ^ Porter (2010, p. 4002)
- ^ Porter (2010, p. 4045)
- ^ a b Porter (2010, pp. 4081–4087)
- ^ Porter (2010, pp. 4355–4358)
- ^ Porter (2010, p. 4362: «If she appeared to be afraid, her subjects, particularly the Lutherans, would only become more audacious, and would proclaim that she had not dared to do her own will (quoting Renard's report to Charles V».)
- ^ Porter (2010, p. 4366)
- ^ a b c d e f g Loades (1996, p. 267)
- ^ Ives (2009, p. 193)
- ^ Ives (2009, pp. 245–246)
- ^ Loades (1996, p. 268)
- ^ Ives (2009, pp. 246–247)
- ^ Loades (1996, p. 272)
- ^ Ives (2009, pp. 218, 243–245)
- ^ Porter (2010, p. 4149)
- ^ a b Loades (1996, p. 274)
Bibliography
[edit]- Ives, E. (2009). Lady Jane Grey: A Tudor Mystery. Oxf.: Wiley-Blackwell. p. 392. ISBN 9781405194136.
- Lee, S. J. (2006). The Mid Tudors: Edward VI and Mary. Questions and Analysis in History. L.: Routledge, 2006. — 168 p. — (Questions and Analysis in History). — ISBN 9780203969083. p. 168. ISBN 978-0-203-96908-3.
- Loades, D. M. (1996). John Dudley, Duke of Northumberland, 1504-1553. Headstart History Papers. Oxf.: Oxford University Press, . — 333 p. — (Headstart History Papers). — ISBN 9780198201939. p. 333. ISBN 978-0-19-820193-9.
- Loades, D. M. (2004). Intrigue and Treason: The Tudor Court, 1547-1558. Pearson. p. 326. ISBN 9780582772267.
- Loades, D. M. (2006). Elizabeth I: A Life. Continuum. p. 410. ISBN 9781852855208.
- McIntosh, J. L. (2009). From heads of household to heads of state: the preaccession households of Mary and Elizabeth Tudor, 1516-1558. N. Y.: Columbia University Press. p. 251. ISBN 9780231135504.
- Porter, L. (2010). Mary Tudor: The First Queen. Hachette Digital. p. 9392. ISBN 9780748122325.
- Williams, P. (1998). The Later Tudors: England, 1547-1603. New Oxford history of England. Oxf.: Oxford University Press. ISBN 9780192880444.