
User:WillWare/Electronics
Microcontrollers and processors[edit]
Arduino[edit]

Arduino Uno board[edit]
There are two ways to program an Arduino board (this also applies to the Boarduino board). One is to use the little GUI programming environment that the Arduino folks have cooked up, where you define a setup() function and a loop() function. The other (which is necessary if you need to restore the bootloader) is to use the 6-pin JTAG-like port with something like the USBtinyISP programmer and the command-line program "avrdude".
When programming with the GUI, you need to have the RX pin unconnected. I've found that leaving it connected to an XBee module will prevent the Arduino from accepting the program. Again this is true of the Boarduino as well.
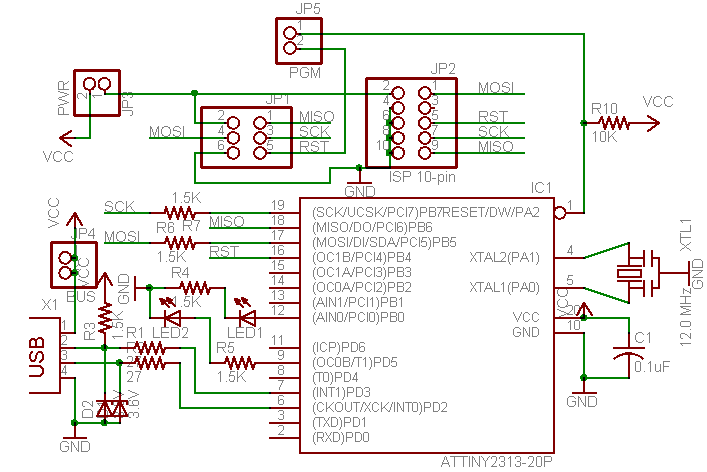
Boarduino (LadyAda)[edit]
Unlike the Arduino Uno, the Boarduino works like a champ every time. Instead of registering as /dev/ttyACM0, the Boarduino registers as /dev/ttyUSB0 which I suspect is healthier.
The one thing you need to watch out for is that when uploading a sketch, you need to make sure that the UART lines aren't connected to anything as they will mess up the uploading process. Otherwise the Boarduino is great.
USBtinyISP[edit]
- Schematic: http://www.ladyada.net/images/usbtinyisp/usbtinyisp.png
- Use with avrdude: http://www.ladyada.net/make/usbtinyisp/avrdude.html
This thing is for when we accidentally trash the bootloader on an Arduino or Boarduino board.
Use the six-pin ribbon cable, and pass it over the center of the target board so that the edge of the board is flush with the end of the ribbon cable (this is the correct orientation for the Arduino Uno and the Boarduino).
You'll probably need to set up a file in /etc/udev/rules.d to work it. I'm a little shaky on what all can go into these files. It doesn't seem to be well documented.
# SUBSYSTEM=="usb", SYSFS{idVendor}=="1781", SYSFS{idProduct}=="0c9f", GROUP="users", MODE="0666"
SUBSYSTEM=="usb", SYSFS{idVendor}=="1781", MODE="0666"
Apparently the actual filename doesn't matter, so I went with 50-usbtinyisp.rules. I successfully programmed the bootloader onto an Arduino Uno board using avrdude at the Linux command line:
avrdude -c usbtiny -p m328p -v -U flash:w:ATmegaBOOT_168_atmega328.hex
ARM microcontrollers[edit]
There is a spectrum of different ARM core architectures. Here's a list of projects for various ARM processors and controllers.
The sequence of ARM core versions appears here.
| Architecture | Family |
|---|---|
| ARMv1 | ARM1 |
| ARMv2 | ARM2, ARM3 |
| ARMv3 | ARM6, ARM7 |
| ARMv4 | StrongARM, ARM7TDMI, ARM9TDMI |
| ARMv5 | ARM7EJ, ARM9E, ARM10E, XScale |
| ARMv6 | ARM11 |
| ARMv7 | Cortex |
AT91SAM7S[edit]
Atmel makes several different AT91SAM devices spanning a few versions of the ARM core. I used an AT91SAM7S for my BluetoothBitBang project. They're inexpensive and the microcontroller has lots of on-chip peripherals.
STM32[edit]
XScale[edit]
StrongARM[edit]
Digital Equipment Corporation, and that's why you never hear about it any more.
LPC1xxx, LC2xxx[edit]
NXP Semiconductors - the LPC1768 is a Cortex-M3 core.
I stupidly ordered one of these rather than Sparkfun's LPC1768 board. There is a directory on my Macbook at work called LPC1768 Board Info or something like that. It contains a schematic and other info.
Here is information on the LPC1768's bootloader.
- http://mbed.org/users/chris/notebook/prototype-to-hardware/
- http://ics.nxp.com/support/documents/microcontrollers/pdf/user.manual.lpc17xx.pdf, all of chapter 32 (starts on page 615) I already have this document on my desktop.
Here is a Windows program that already knows how to talk to the bootloader.
My impression from a quick glimpse at chapter 32 is the following.
- To go into the bootloader, you hold down pin P2.10 while you pulse reset low. It needs a pull-up to avoid accidental bootloader mode.
- Once you're there, you send commands in via UART0 and get replies back. List of commands on page 623, nothing tricky. On the mcu123.net board, UART0 is pins 23 and 24 of the OU4 connector. Level-shifting required. At some point I'll need to spend a couple days writing code to do that, but it will pay off well.
This forum discussion says:
To build GCC for Cortex-M3 first build Binutils with
--target=arm-elf
Then configure GCC with
--target=arm-elf --with-cpu=cortex-m3 --with-tune=cortex-m3 --with-mode=thumb --with-float=soft --disable-libssp
This will ensure that libgcc.a is optimized for Cortex-M3 and that you later don't need to pass -mcpu=cortex-m3 and -msoft-float to GCC. It will prevent libgcc from being build in non-thumb mode, though.
Libssp needs the target's C header files to build, so it's easier to disable it.
OMAP[edit]
Texas Instruments. The OMAP appears on the BeagleBoard, and also the PandaBoard and Hawk board.

- OMAP page on Wikipedia
- Texas Instruments web page on the OMAP 4430 used in the PandaBoard
- Presentation wherein Texas Instruments explains their design thought process for the 4430
- BeagleBoard with OMAP 3530: website, manual (pdf), wiki, wikipedia
- PandaBoard with OMAP 4430: website, wiki, wikipedia
The big draw here is that it has a DSP core in addition to a normal processor core. That might be useful if we start to get serious about speech recognition.
But I can't find a datasheet and the architecture looks monstrously complicated. How do you write code for it, and how do you take advantage of more than 2% of its capabilities?
The PandaBoard is on backorder, so I'll be working with the BeagleBoard. There are various efforts to get Linux running on it.
- http://elinux.org/BeagleBoardBeginners
- http://code.google.com/p/rowboat/ -- (Android, not Linux)
- http://www.ibm.com/developerworks/linux/library/l-beagle-board/ -- this has a comfortingly authoritative look to it
- http://www.tincantools.com/product.php?productid=16134 -- The Flyswatter is a compact USB to JTAG in-circuit debugger and programmer designed for ARM cores. It can be used with all ARM processors that are supported by OpenOCD. It connects via USB to the host PC. The Flyswatter provides a standard 14-pin JTAG interface as well as a standard RS232 port with support for full modem signals.
- http://dkc1.digikey.com/us/en/mkt/beagleboard.html -- Digikey's info page about BeagleBoard
- http://www.openismus.com/documents/linux/embedded/beagleboard_getting_started
- http://www.linuxuser.co.uk/features/an-introduction-to-embedded-linux-beagleboard-its-linux-kernel-port/
- http://code.google.com/p/beagleboard/wiki/BootingBeagleBoard -- looks like some sort of bootloader for BeagleBoard
Operating systems for BeagleBoard[edit]
I did a bunch of work with Angstrom, a small Linux distribution, described at User:WillWare/Angstrom_and_Beagleboard.
Here's some existing work on Ubuntu for Beagleboard. No need to reinvent what others have done: http://elinux.org/BeagleBoardUbuntu Also see https://github.com/RobertCNelson/stable-kernel Remember the Always Innovating Touchbook tablet? That's supported too: https://github.com/RobertCNelson/stable-kernel/tree/master/patches/touchbook
More:
- http://www.elinux.org/BeagleBoard_Ubuntu_%26_DSP_From_Sources
- http://elinux.org/BeagleBoard
- https://wiki.ubuntu.com/ARM/Beagle (Canonical is in on this)
- https://wiki.ubuntu.com/ARM/BeagleNetInstall
- https://wiki.ubuntu.com/ARM/OMAPMaverickInstall
- https://wiki.ubuntu.com/ARM/RootfsFromScratch
- https://launchpad.net/project-rootstock/
- http://www.ibm.com/developerworks/linux/tutorials/l-embedded-distro/index.html
- http://www.ibm.com/developerworks/linux/library/l-beagle-board/ (this is Angstrom running on Beagleboard)
- http://www.ibm.com/developerworks/linux/library/l-beagleboard-xm/ (this is the Beagleboard xM, and covers Angstrom, Android, and Ubuntu)
D-Link DWL-G122 wireless G USB adapter works with Ubuntu on Beagleboard
Robert Nelson's slideshow about running Ubuntu on Beagleboard
- http://www.youtube.com/watch?v=igYE031Xhgw (part 1)
- http://www.youtube.com/watch?v=3tCxDl0aKU8 (part 2)
It should be pretty straightforward to get Ubuntu running on the Beagleboard, and to write or find instructional material about bootloaders, rootfs, zImage, all that stuff. Here's some info about that.
- http://www.simtec.co.uk/products/SWLINUX/files/booting_article.html
- http://amitshah.bizhat.com/arm/arm_linux_boot-1.html
- http://bootloader.wikidot.com/linux:boot:zimage-layout is this relevant? I'm not sure
So I get this working, and I write or find instructional material, blog about it, whatever. Then I write a bunch of kernel drivers to provide access to various OMAP peripherals, and I2C support for off-board I2C devices. I might find some Beagleboard daughterboards: http://www.tincantools.com/product.php?productid=16147 http://elinux.org/BeagleBoard_Trainer http://elinux.org/BeagleBoard_Zippy2 I kinda want to do my own board:
- a reasonably fast ADC and DAC, not tied to video
- a compass, accelerometer, gyro, and GPS (http://www.sparkfun.com/products/9060), draw inspiration from http://www.sparkfun.com/products/10027 -- plan to make each part optional expansion of the I/O capabilities, something like http://www.ti.com/lit/ds/symlink/pcf8575c.pdf or Harvest's 16-channel serial connection FPGA
- expansion of the memory, something like an HD, maybe like http://www.ocztechnology.com/ocz-vertex-series-sata-ii-2-5-ssd.html
Communication channels[edit]
ZigBee / XBee[edit]


XBee Series 2 module[edit]
- Sparkfun page: http://www.sparkfun.com/products/10414
- Datasheet: http://ftp1.digi.com/support/documentation/90000976_G.pdf
XBee breakout board[edit]
- Sparkfun page: http://www.sparkfun.com/products/8276
XBee FTDI adapter[edit]
These can be used with X-CTU (running on Windows, or WINE, or a Windows instance on VMware or VBox) to program the radio parameters of the XBee Series 2 module.
Serial port over ZigBee[edit]
I have two XBee Series 2 modules, one plugged into the FTDI adapter, so the Linux netbook connects to it via minicom on /dev/ttyUSB0 at 9600 baud. The other talks to a Boarduino, using approximately the schematic from page 202 of the Making Things Talk book, with the Boarduino providing 3.3 volts for the XBee module as shown at right. The two XBee modules form a 9600-baud serial port connecting the Linux netbook to the Boarduino. The Boarduino sits in a loop sending messages to the netbook every second.
void setup() {
  Serial.begin(9600);
  pinMode(13, OUTPUT);
}
void loop() {
  Serial.println("on");
  digitalWrite(13, HIGH);   // LED on
  delay(1000);
  Serial.println("off");
  digitalWrite(13, LOW);    // LED off
  delay(1000);
}
Minicom is great but it doesn't lend itself to scriptable or programmatic communication. For that we turn to Python.
import serial, sys
s = serial.Serial('/dev/ttyUSB0')
while True:
  sys.stdout.write(s.readline())
Bluetooth[edit]

Bluetooth modem from Sparkfun[edit]
These are cheap and easy to use. I am using one in my Bluetooth Bit Bang gadget.
Wifi[edit]
There are wifi modules but they seem fairly expensive. Probably best if we have a central controller (either ZigBee or Bluetooth) which happens to be sitting on a network.
User interfaces[edit]
Mobile phones, tablets, web browsers[edit]
If you have a network of ZigBee/Bluetooth/USB gadgets, all reporting data to some central repository, you'd like to be able to query all that data from your phone, and issue commands (e.g. switch on/off appliances and lights). You'd also like to be able to turn on your coffeepot from any remote location assuming suitable security.
I'd like to connect this to an app running on Google App Engine to make it accessible and controllable via a web browser anywhere, given suitable security protections.
- Android app: https://github.com/wware/stuff/tree/master/home-auto-hub/HomeHub
- Web app on app engine
The network polls the GAE app at some polling frequency, maybe every 30 seconds, which determines the latency for sending control signals to the network. The network can send up new information at any time, so upward latency is very low. The network can be remotely instructed to increase its polling frequency for a limited period of time.
Chrome browser and extensions[edit]
Abstraction layers[edit]
Reference implementations[edit]
Reference implementations can sometimes be used to (a) prototype the system and (b) provide a reference for regression testing. This works when the reference implementation is simpler and quicker and cheaper than the real thing, or when it provides more accessible testpoints.
Certainly we want to build working hardware prototypes of any design we want Foxlink to work on, and we should probably send them a copy of the working prototype. It should run exactly the same software as the final gadget. As the design evolves, the prototype should be updated to track the design and to confirm that it continues to work as expected.
Networking[edit]
USB and ZigBee both involve a network with relatively few leaf nodes and one central controller. If the controller is willing to poll all the leaf nodes (presuming they're awake) then it might be possible to implement IP on top of this topology, and then you could do TCP, HTTP, etc. Then leaf nodes can run little HTTP servers.
Miscellaneous[edit]
GPIO[edit]
USBMOD4 (Hobby Engineering)[edit]
My own stuff[edit]
Relay-switched power strip[edit]

Internals: http://www.flickr.com/photos/28098191@N00/5596724653/
This is a gadget I hacked up for a home automation project.
Things I don't want to lose track of[edit]
- Here's a large fast static RAM chip that I want to use in a FPGA circuit: http://search.digikey.com/scripts/DkSearch/dksus.dll?Detail&name=428-1982-ND
- Here are a bunch of cool surface-mount adapters: http://www.futurlec.com/SMD_Adapters.shtml
My radio board from a year ago[edit]
A renaissance for electronics hobbydom[edit]
I was an electronics hobbyist in the 1970s and an EE in the 1980s and 1990s. There was a long history of tubes, discrete transistors, and dual inline packages and wire wrap, that brought us to the 1980s when surface-mount technology took off, and like many hobbyists, I figured that was the end of electronics as a hobby. As I got older, my eyesight wasn't getting any better and my hands weren't getting any steadier.
Now three things allow almost ANY hobbyist to build very complex boards on a very small budget.
- Printed circuit CAD packages like Cadsoft Eagle are getting more affordable - in particular, they have free versions that can do remarkable things.
- Printed circuit board houses have very affordable deals on small runs of prototypes. In the next few years, more inexpensive PCB houses will come on line, and these deals will get even better.
- Homebrew assembly techniques make it possible to solder fine-pitch surface-mount parts on a shoestring budget, without superhuman hand-eye coordination.
These are technologies that empower the little guy, just like Neil Gershenfeld's Fab lab project. Electronics is not something that only huge corporations can do. The next big fun gadget might come out of a high school kid's garage, the way the first Apple computers did.
I would like to see a lot of open-source and public-domain hardware designs out there. That could help to start a new generation of electronics hobbyists.
The radio board[edit]
This is intended to be a cheap software radio board, available in time to have some useful impact on the legal fight of EFF vs. Broadcast Flag (July 1st 2005). I hope to make it very affordable (sub-$100 if possible) and use some of the same parts and ideas that go into the Universal Software Radio Peripheral. So it will be like the USRP for high school and college kids. This board is being designed by Will Ware N1IBT, reachable at mailto:wware@alum.mit.edu.
- Cypress CY7C68013 USB microcontroller, which is an 8051 core with a USB2 interface and various I/O, I hope I can get these for about ten bucks
- Xilinx XC3S400-4TQ144C FPGA for quadrature demodulator, $22 from Xilinx online store
- Analog Devices AD9225 A/D converter, 12 bits, 25 MSPS (sampling at 24 MHz because the 68013 likes a 24 MHz clock), $23 at Digikey
- Two-layer PC board, http://ecommerce.pcbfabexpress.com/preview_specs.jsp, $13
- Soldering parts onto board, maybe $10
- Assorted odds and ends, $10-ish
- Total for the board, $90-ish
When I've gotten some boards assembled, I'll post a more accurate breakdown of prices. I'm using Eagle Light for Linux to do the schematic and PCB layout. The version I'm using is free/gratis, not free/libre, but when I start selling boards, I'll need to pay a $50 registration fee.
Tarball of Eagle design files and custom library, and Gerber files and drill info: http://users.rcn.com/wware1/n1ibt.zip
In the past I've done boards using ExpressPCB but their business model is to lock you into their service by encrypting the Gerber files used to make the PCB, so you can't get the board made by anybody else. Gerber files are a text-based file format, and once produced with any layout software (free or not), the Gerber file itself can be freed under the GNU Free Documentation License or one of the Creative Commons licenses. The Gerber files in the zip archive above are free under the GFDL, until somebody convinces me a CC license is a better idea.
Handy dimensional info about standard machine screw sizes: http://www.on-b.com/doc/inch.htm
Even at baseband this will be a fun little radio. Plug a long wire into the antenna connector, plug the USB cable into your laptop, install the software, and you should be able to pick up AM, a lot of shortwave, and a number of ham bands with no RF board. Later I might whip up a little DAC daughterboard to allow it to transmit QRP. Then it could do spread-spectrum transmit and receive, making it the cereal-box secret decoder ring for the 21st century.
There's a fair chance that the board will be ready by the end of April. I'll provide as much information as I can to help people make their own boards. If you're reading this and like the idea of making and selling boards, please be aware that you have my encouragement and support. Once I've got a working design, the things you'll need to make boards are:
- What parts do I need, and where to buy them? [Parts list] and vendor info
- How do I get printed-circuit boards made up? I've googled for a few of these, and http://www.pcbfabexpress.com looks good to me.
- How do I get the parts soldered onto the board?
- Personally I go to a place called [Contract Assembly] here in the Boston area. If you're not near Boston, go to [Google Local], plug in "PCB Assembly" and your town and state, and see what you can find. This approach makes plenty of sense for large runs (dozens or more) but a possible alternative exists for itty-bitty prototype runs.
- I have also been collecting some links about HomebrewSurfaceMountConstruction, which describe daring feats with toaster ovens and hot air blowers. I am going to try some of these tricks. They look pretty straightforward and inexpensive, and going to a pro assembly house can rack up the bucks pretty quickly.
I've gotten all the parts to build ten of these boards, and populated one successfully. When I learned that there were design imperfections in the analog area, I didn't want to get all ten built. It ended up making more sense doing homebrew surface-mount construction than going to the assembly house.

The FPGA chip in the lower right is assembled WRONG in this picture! If you could unsolder it, rotate it clockwise 90 degrees, and resolder it, that would be correct.
As of this writing I haven't tested it yet. I stupidly failed to check that the SMA connector had the exact footprint that Eagle PCB expected, so gauche-looking wires for now.
I plugged it in and nothing smokes. That's good. But the 3.3 volt regulator gets hot, and it's producing much less than 3.3 volts. I'll tack on an LM317 with appropriate resistors.
When I discussed this project with a co-worker, he mentioned that he'd been involved in something vaguely similar in a professional (non-hobbyist) capacity, and he collected information about a lot of high-performance A/D converters. I don't think he'd mind my sharing his notes here.
Email, progress (or more accurately, stagnation)[edit]
PC Board design and FAB. I use ExpressPCB? and thir system is cumbersome but will yield a Gerber File for $60. I design with their software and have the board made elswhere, primarily because they don't provide routing, so I can snap the boards apart after I assemble them. I use http://standardpc.com/ They do a great job and their prices are great, even for small quantities. Bob is the engineering guy. If I can help, let me know -- joelfrigon-at-yahoo.com
4 July 2005 - I've started to get some recent inquiries about how things are going with the board. Basically things got stalled. In early May, the original BroadcastFlag initiative was defeated, so the original legal/political motivation for making haste was gone. In late May I went out to Hamvention and got to spend some time with Eric and Matt, which was fun and thought-provoking, and we agreed that everybody's interests would be well served if my board could work with USRP daughterboards.
June was a busy month, so only a little work on the board itself got done. I discovered that the too-hot voltage regulators were because (a) my FPGA was ROTATED 90 DEGREES (doh!); and (b) I'd used a 3.3v regulator that was too small. There were also a couple of minor wiring bugs around the CY7C68013. SCL (pin 29) must get a pull-up resistor just like SDA, or the 68013 won't boot. I think the NC pin (pin 27) is supposed to be grounded, though I'm not sure that's strictly necessary.
The rotation issue is just assembly stupidity on my part, the other stuff necessitates a board respin. While I'm at it, the board could use ground planes for the analog and digital parts.
Some of the progress has been fun: I got fxload working on Linux, wrote some simple 68013 code, and got it to load onto the board and run. The 68013 was sending characters out its serial port. But if I hit a part that isn't fun to work on, the work slows down because this is just a hobby project. Now I need to accept a stream of bits over the USB cable and use them to program the FPGA. Figuring out how to get data from the end of the USB hose is confusing. See [section eight]. One person who inquired about the board asked what the ribbon cable connector is for. I could glibly say "future expansion", but I'd like to expand on it a bit. This board is a completely open design, both hardware and software. As a user, you'll be free to reprogram or reconfigure any piece of it. If you reprogram the FPGA, you can use the board to transmit as well as receive. Or you can use it as a handy USB-2 interface for a high-bandwith project of your own, such as an oscilloscope or logic analyzer.
6 August 2005
I've now had three or four inquiries. Some just say "Go go go hurry up go go". Others have been more helpful and are interested in doing some of the work of making the board useable. So I am starting to think about how to involve those people.
I have parts left to build up a few more boards. I've got fixes for the major hardware bugs:
- The 3.3 volt regulator is too small, so remove it and bolt on a TO-220-packaged regulator.
- Tie pin 27 of the 68013 to ground (the NC pin).
- Add a pull-up resistor for pin 29 of the 68013, just like pin 30 (SCL and SDA respectively).
- Solder on the FPGA with the correct orientation. I'm still feeling very dumb about this.
Maybe I should populate a couple more boards and donate them to people willing to help. I am considering this.
I have one board that's in good enough shape that I can do software development on it. My current stumbling block is the 68013's access to endpoints, which is needed for the host computer to program the FPGA. Once that's figured out, I need to borrow or write Verilog code for the FPGA. At that point finishing up any remaining 68013 code should be pretty straightforward.
7 December 2005
Following a change of jobs, I'm hoping to have a little more time for this project. I've been contacted by a university group in India and they're eager to work with the board.
4 July 2006
Still pretty much completely stalled, but at least I've moved the page to Wikipedia. It previously resided at http://comsec.com/wiki?N1ibtSoftwareRadioBoard, which was made read-only because of wiki spam.
A change of strategery[edit]
Given the problems that have plagued the radio board so far, I think I ought to probably back off to a more manageable task, and reattack the problem in a more measured way. The original idea of quickly going straight to a cheap single board was prompted by the imminent threat of broadcast flag legislation, and if I'm not mistaken, that boat has already sailed.
I think it makes sense to work on one board with the CPU and FPGA, and then later work on the ADC board. My rationale here is that the CPU/FPGA board is useful for many other projects, and it gives me a chance to get familiar with programming the CPU and FPGA.
Hmm. Can't I just do that with the existing board, not populating the ADC part? Yeah, but I can't use it for non-ADC applications so easily, because those pins are wired direct to the ADC. Hmm.
Programming the FX2[edit]
The terms "FX2" and "68013" both refer to the CPU, which is an eight-bit 8051 core with USB slave peripheral hardware on-chip. "FX2" is a marketing name, "68013" is part of the official part number.
- FX2 data sheet: http://comsec.com/usrp/CY7C68013.pdf
- Helpful FX2 info: http://comsec.com/usrp/FX2_TechRefManual.pdf
One source of good ideas is the CVS repository for USRP firmware. Once the FX2 is programmed, it programs the FPGA by feeding it a sequence of bits or bytes that configure all the gates and datapaths and doohickeys inside.
SDCC is a good C compiler for programming the FX2.
- Source for SDCC: http://sdcc.sourceforge.net/
- A manual for SDCC: http://sdcc.sourceforge.net/doc/sdccman.pdf
Some examples I found, including communicating via bulk endpoints[edit]
Wolfgang Wieser is a gentleman and a scholar, as well as a rocket scientist.
- http://www.triplespark.net/elec/periph/USB-FX2/software/
- http://www.triplespark.net/elec/analysis/USB-LiveOsci/software.html
This page has two "hello world" examples. In one, text is written into the FX2's on-chip RAM and read back over the USB while the FX2 is held in reset. In the next test, a "hello world" message is transmitted by the host to the FX2 over bulk endpoint 2, and returned to the host over bulk endpoint 6. Very cool.
This page discusses interaction with hardware FIFOs.
These others may also be helpful.
- http://oscar.dcarr.org/ssrp/software/firmware/firmware.php
- http://volodya-project.sourceforge.net/fx2_programmer.php
- http://volodya-project.sourceforge.net/SR/SR-1/sr1.php
A test I did with the old board[edit]
On the 2004 radio board, I programmed the FX2 to repeatedly send the ASCII character 'A' from its serial port. I verified the serial port transmission with an oscilloscope. This demonstrated that renumeration was working correctly, and that SDCC was a good compiler for the FX2.
Renumeration[edit]
The FX2 is configured over the USB cable using a process called renumeration (see section 3.6 of the data sheet).
- Source for fxload: http://cvs.sourceforge.net/viewcvs.py/linux-hotplug/fxload/
- More fxload info: http://linux-hotplug.sourceforge.net/?selected=usb and http://www.linux-usb.org/ezusb/
In the past I used a program called fxload to program the FX2. The setup for doing this was complicated and obtuse. I have since switched to Wolfgang Wieser's much more straightforward and more capable CycFX2Prog tool. Grab the source tarball, build it, and put cycfx2prog in /usr/local/bin.
Now use SDCC to build a *.ihx file, and then load it like this.
sudo cycfx2prog prg:foo.ihx run
This works fine with the "hi.c" example packaged with SDCC, so the command line argument is "hi.ihx". You need the "sudo" because talking directly to the USB port can only be done as root. Read the command summary to see other things cycfx2prog can do. It can communicate with USB endpoints.
I am currently stuck on Wolfgang's hello_world_ram example. It's not working for me, and I have no idea why not. From the host's perspective, my board shouldn't differ enough from his to make a difference.
Programming the FPGA[edit]
Once the FX2 is programmed, it will program the FPGA. It doesn't have enough memory to hold the FPGA's program, which must be shipped down from the host computer over the USB cable.
I haven't done much work on this yet, here are a few links. Full disclosure: I have not yet gotten an FPGA working in this setup. I have full confidence that it's doable, I just haven't done it yet.
- http://www.polybus.com/xilinx_on_linux.html
- http://www.linuxjournal.com/article/6857
- http://www.comsec.com/wiki?FpgaToolChain
- http://www.verilog.net/free.html
- http://gentoo-wiki.com/HOWTO_Xilinx
Xilinx ISE development environment
- http://www.xilinx.com/ise/logic_design_prod/webpack.htm
- http://www.xilinx.com/products/design_resources/design_tool/index.htm
A few notes on my blog.
The USB/FPGA board, October-December 2006[edit]


Earlier I wrote about a "board with the CPU and FPGA", and I've finally got that designed, and hope to assemble it in the next couple of weeks. I am being assisted in its fabrication by a fellow in Bangalore who is keenly interested in the software-defined radio application. But a board like this can have other applications as well - it can be used for instruments like oscilloscopes and logic analyzers, and possibly a medical ultrasound device.
The board will be 3.2 inches by 2.7 inches, with an estimated manufacturing cost of $70. As a free and open design, its price to a user should be very little more than that. The USB link can theoretically transfer data at 56 megabytes per second, but that's probably a peak rate. So I hope this will provide a high-speed interface that will address a lot of hobbyist needs. I laid out the mounting holes and the 26-pin connectors on the USB/FPGA board to fall on a 0.1-inch grid, since so much prototyping hardware here in the U.S. uses that grid size. The board is open source hardware; the design is in the public domain.
Once it's up and running, I will post the Gerber and drill files and parts list on the web somewhere. I'll probably sell some boards myself, but others will be encouraged to make (and sell, if they wish) their own boards.
Separate A/D board[edit]
To address the original intent of providing a software-defined radio receiver, we need an A/D board that plugs together with this board. Here are a couple of good choices for A/D converters available from Digikey at reasonable prices. Both are 12-bit converters in 28-pin TSSOP packages with 3.3 volt supply voltages.
- Analog Devices AD9235, 20 megasamples/second, $13.73
- Analog Devices AD9236, 80 megasamples/second, $29.13
Putting the A/D converter on a separate board should make this a much quieter radio than the original board would have been. The ground planes can be connected by an inductor to further isolate the digital circuit noise from the analog input. It's probably good to create the A/D's supply with a separate 3.3 volt regulator, maybe from the USB-supplied 5 volts if there is enough current.
As far as I am aware, the AD9235 and AD9236 differ only in their price and their sampling rate, so maybe the same printed circuit board will work for either one. That would be good.
Two-layer prototype[edit]

I found the least expensive approach was to make up a two-layer prototype with these guys:
- Imagineering,Inc.
- 180 Martin Lane
- Elk Grove Village, IL 60007
- Phone: 847-806-0003 Fax: 847-806-0004
- http://www.PCBnet.com
You can get a two-layer board made up for a flat rate of $25. Expedited shipping is another $25. For that price you can go up to 60 square inches, but my board's probably only about ten. This is just a check for correctness of the schematic. The four-layer layout will be more carefully done and electrically quieter, so more suitable for radio work. I'll get the four-layer boards done by http://pcbex.com, and probably have twenty made.
The two-layer board pictured on the right has passed all the tests to show that the FX2 is working. I have not yet programmed the FPGA. There are two LEDs so I can flash some recognizable pattern to verify that the FPGA is doing the right thing.
Back into the breach, March 2010[edit]

I'm getting ready to take another stab at JTAG-programming a Xilinx FPGA. I never did figure out why it didn't work last time, when I had a USB-enabled microcontroller and I was able to control the GPIO pins over the USB cable. That should have worked.